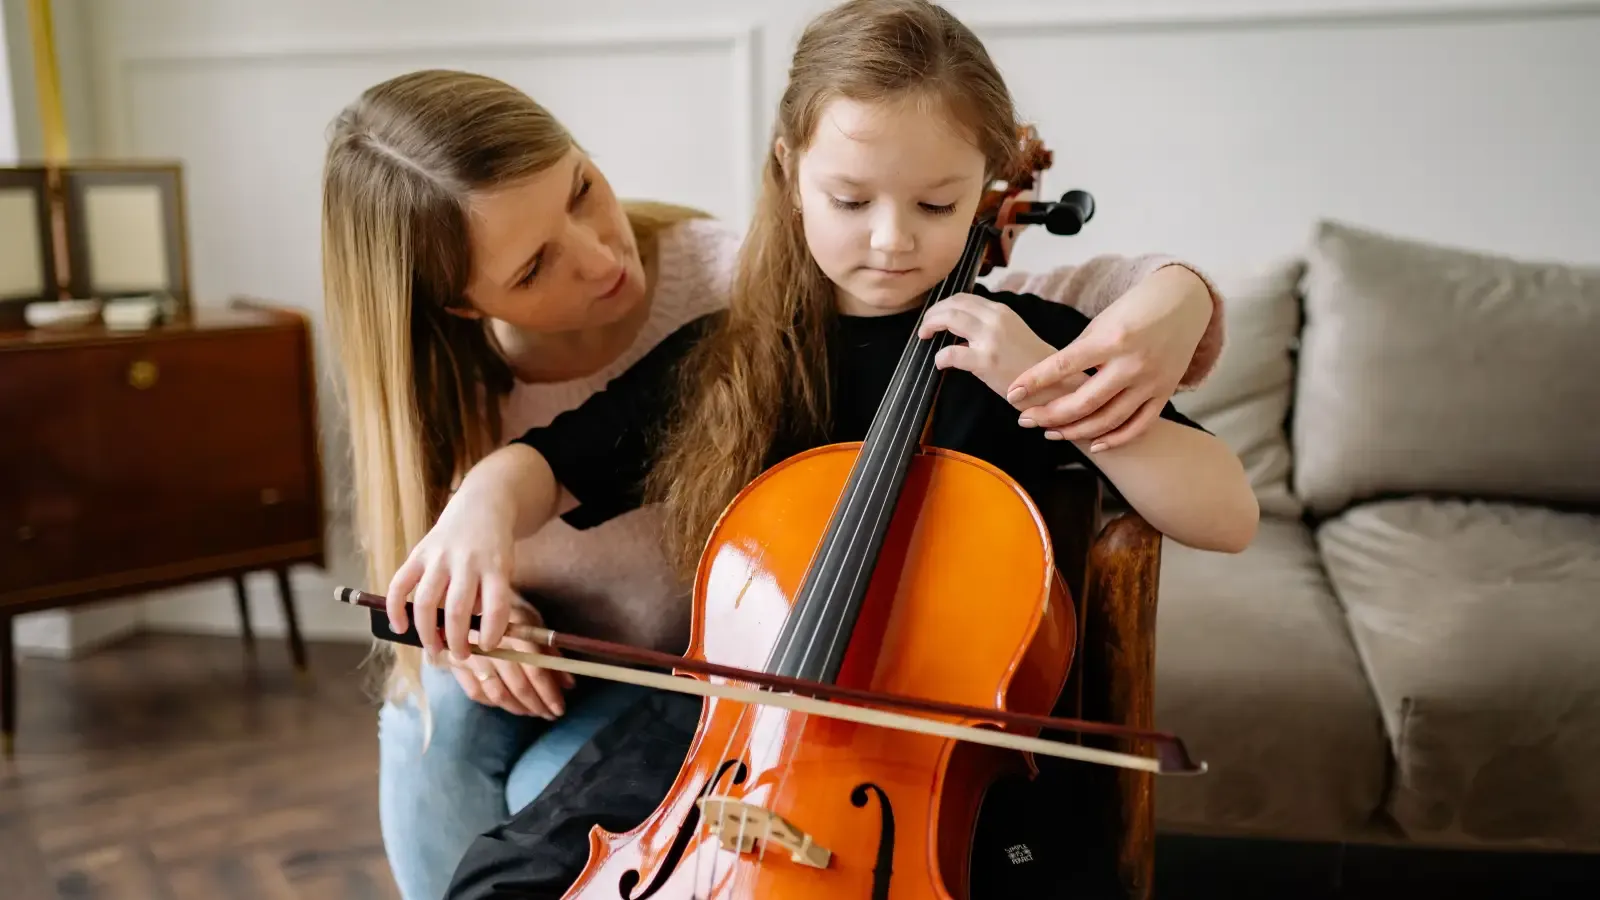
A violin teacher inspects a bow hold for a dynamic balance between the thumb, fingers, and bow—not a fixed grip. The teacher checks that the thumb, index, middle, and pinky fingers interact in a way that lets the bow rest in the hand, absorbing and transferring weight without locking up. This article builds that hold step by step and highlights the exact details a teacher watches for.
What You’ll Need to Check Your Own Bow Hold
A clean setup makes verification possible. Gather these before you start:
- A correctly sized violin and bow, rosined and tightened so the stick has a gentle curve but doesn’t touch the hair at the midpoint.
- A full-length mirror or a smartphone on a tripod so you can see your hand from the side and front.
- A quiet practice space without interruptions—this is systematic work, not casual noodling.
Building a Relaxed Bow Hold Contact by Contact
A teacher follows a predictable inspection sequence: thumb, middle fingers, index finger, pinky, then the entire hand in motion. Follow the same order.
Step 1: The Thumb – Create a Shock Absorber, Not a Vise
Place the tip of a bent thumb against the bow stick, right where the leather winding meets the frog. The thumb forms a curved “C” shape—nail pointing outward and slightly down, pad touching the stick and a small section of the frog’s edge. Avoid pressing the thumbnail into the leather.
Why it matters: A curved thumb works as a spring. It compresses under the index finger’s pressure and the arm’s weight, then releases enough to let the string vibrate. A straight thumb gives no yield; the entire hand stiffens.
What the teacher inspects: They look at the thumb from the side to confirm the joint is bent but not collapsed inward (hyperextended) or pushed out into a banana curve. They may pull gently on the bow while you hold it—if the thumb jumps away, the pressure was too high.
Step 2: The Middle Two Fingers – Drape, Don’t Grip
Allow the middle and ring fingers to drape over the bow stick. The first knuckle of each finger sits just ahead of the stick (closer to the scroll), and the fingertips rest lightly on the frog’s silver plate or the leather wrap, depending on hand size. The fingers wrap with a natural curve.
Why it matters: These two fingers stabilize sideways tilt. Squeezing them limits smooth pivoting and sends tension into the palm. Their function is to cradle, not to clamp.
What the teacher inspects: They check that the stick sits behind the first knuckle line—deep enough to stop side-to-side roll, shallow enough for micro-adjustments. They may wiggle the bow while you hold it. If the hold is correct, the fingers allow small independent movement without dropping the bow; if you are gripping, the whole hand moves as one rigid unit.
Step 3: The Index Finger – Control Leverage, Not Pressure
Rest the index finger on the bow stick between the first and second knuckle. For the Franco-Belgian hold (the default most teachers use with beginners), the contact is on the side of the first joint, on the leather or silver grip. This point shifts slightly as the bow travels: closer to the second knuckle at the frog for leverage, rolling onto the side at the tip for lightness.
Why it matters: The index finger transmits arm weight and governs bow pressure. A stationary, clamped index blocks dynamic control and forces a pressed, scratchy sound. A movable contact point lets you lean into forte and lighten for piano.
What the teacher inspects: During a bow stroke, they watch for subtle contact point shifts while the knuckle stays rounded. They often lift your index finger off the stick while you hold the bow—if the finger lifts easily and the hold remains stable, it’s relaxed; if the whole hand tightens or the finger resists, you are gripping.
Step 4: The Pinky – Balance, Not Braking
Place the tip of a curved pinky on top of the stick, close to the screw. The pinky must be rounded—not straight, not locked, and not hooking over. On a down bow, it rests lightly; on an up bow, it engages just enough to assist lifting at the frog, but never pushes down actively.
Why it matters: The pinky counterbalances the bow’s weight at the frog and controls tilt. A straight pinky either pops off or locks the hand. A working pinky behaves like a spring-loaded casting arm on a fishing rod.
What the teacher inspects: They look for a pinky that stays curved through a full bow stroke. They might tap it—a responsive, springy pinky indicates the finger is alive. A stiff, straight one signals a static hold.
Step 5: The Wrist and Fingers – Think Flexible System
Set the bow on the string and play whole bows on open strings, from frog to tip. Maintain the contact points, but let them move. The wrist leads direction changes with a smooth rolling action. Fingers adapt: at the frog, the thumb straightens a fraction and the pinky works more; at the tip, the thumb bends deeper and the pinky barely touches.
Why it matters: A bow hold is not a photograph; it’s a moving system. The teacher watches for a hand that travels with the bow, not one that stays locked while the arm yanks the bow through a fixed grip.
What the teacher inspects: During full bows, they check for a flexible wrist that initiates changes, not a rigid forearm. They may ask for rapid détaché. If the fingers stay supple and the stroke stays even, the hold works. Jerkiness or a hand that moves as a single block means tension must be released.
Mistakes That Make Your Teacher Reach for a Correction
These are common, and each one has a practical fix.
The Thumb Lock: Pressing the Stick Instead of Cradling It
A straight thumb or one that jams into the stick tightens the entire hand. The teacher sees a rigidly straight thumb, often with the knuckle turning white. The tone becomes harsh and the bow bounces unpredictably.
How to fix it: Reset the thumb with a soft curve. Practice holding the bow with only the thumb and middle two fingers for short stretches to feel how little force is necessary. During playing, consciously release thumb pressure every few measures and let the pad rest on the stick without pushing.
The Index Finger Clamp: Squeezing from the Top
The index finger digs in as if holding the bow down. The teacher spots a flattened index finger, often with a red mark after playing, and a choked tone. The cause is usually trying to control volume with finger force instead of arm weight.
How to fix it: Practice resting the index finger lightly on the stick, then briefly lift it an inch off during a down bow at the frog (the other fingers still hold the bow). If the bow stays under control, the index wasn’t clamped. If the bow drops or the sound cuts out, you were squeezing.
The Straight Pinky: Losing Your Counterbalance
A straight or hyperextended pinky can’t react. It either slips off at the frog or becomes a rigid strut. The teacher sees a pinky pointing upward and a clunky bow change.
How to fix it: Use spider crawls on the bow—walk your fingers up and down the stick—to build pinky independence. Away from the bow, tap a tabletop with a curved pinky to train the shape. On the bow, keep it rounded even when lifting into an up bow.
The Frozen Wrist: Ignoring the Bow’s Movement
A stiff wrist makes every bow change a shoulder-driven lurch. The teacher sees a forearm that leads like a broom handle, producing uneven sound and clumsy string crossings.
How to fix it: Isolate the wrist by holding the bow with only the thumb, middle, and ring fingers (index and pinky floating). Practice short, fast wrist-only strokes near the balance point of the bow. Restore the full hold only after the wrist leads naturally.
The Collapsed Thumb: Hyperextending Inward
The thumb joint bends backward toward the palm, hollowing out the thumb. The teacher sees a thumb with the nail pointing upward and the pad flattened. All spring is gone; the hand cannot adjust to bow changes.
How to fix it: Train thumb awareness off the bow. Form the bow hold in the air and pull the thumb tip forward gently to keep it rounded. Place the bow into your hand without letting that roundness collapse. Check the thumb in a mirror every few minutes.
Frequently Asked Questions About Bow Holds
Which bow hold is correct: Franco-Belgian or Russian?
Most teachers introduce the Franco-Belgian hold first. It gives a reliable mix of control and flexibility with less extreme finger placement. The Russian hold places the index finger deeper (closer to the second knuckle) and keeps the pinky more on top for greater leverage, but it demands more hand strength. Neither is wrong, but until you have a specific reason to switch, the Franco-Belgian setup described here is the dependable starting point.
How do I know if my bow hold is too tight?
A quick test: while holding the bow, use your free hand to lift each finger one at a time. If lifting a finger makes the whole hand tense or jams the bow into your thumb, the hold is too tight. Also, after playing, inspect your thumb and fingers for red marks or blanched spots. Those indicate pressure that should not be there.
Why does my pinky keep slipping off the bow?
The most common reasons: the pinky is straight, or you are pulling the bow toward your palm during an up bow, which rolls the stick off the pinky. Keep the pinky curved and let it engage at the frog, but also check that your middle fingers aren’t over-gripping and tilting the bow too far forward.
My teacher says my bow hold is good but I still feel tense—what should I check?
Look above the hand. Tension often starts in the shoulder or neck and travels into the fingers. Release your shoulder blade downward before each stroke and let your elbow hang by its own weight. Aim to hold the bow so lightly that someone could gently pull it out of your hand—that level of grip is your target.
What You Can Do Today to Lock In These Checks
You now have a specific checklist: the thumb curves, the middle fingers drape, the index finger shifts, the pinky springs, and the wrist leads. You also know the typical mistakes that break each point.
Your next action: spend ten focused minutes in front of a mirror. Play open strings slowly, stopping after each bow change to examine one contact point. Record a short video with your phone and compare what you see against this list. At your next lesson, ask your teacher to name the single adjustment that will most improve your tone—and then commit to that correction.