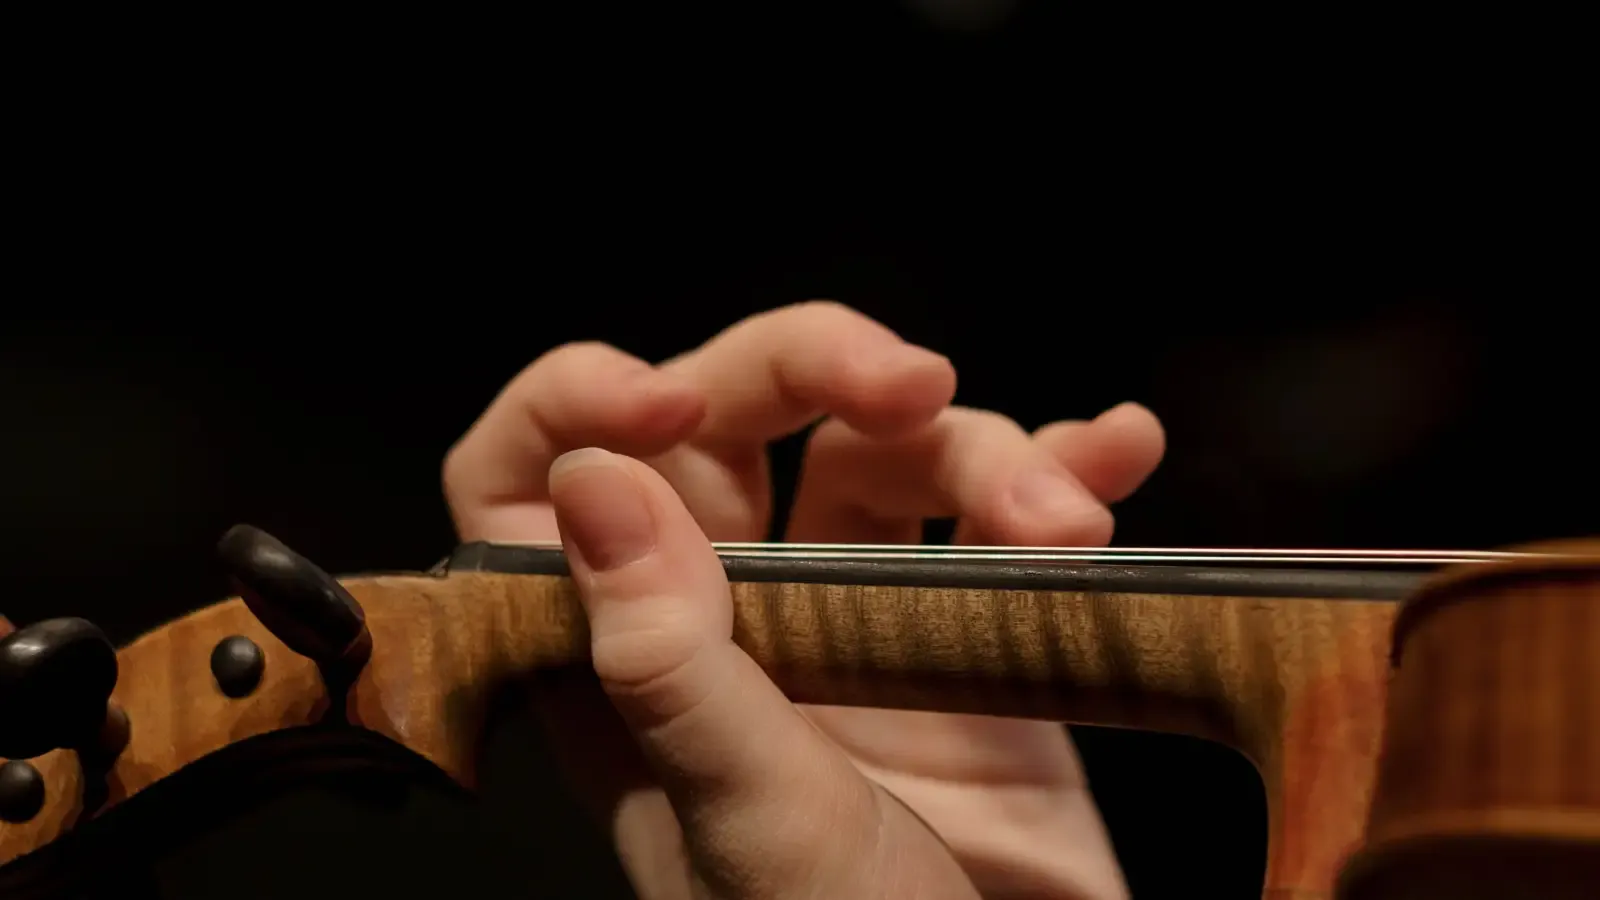
A scratchy violin sound usually comes from one of four left-hand mistakes: a collapsed wrist, a thumb claw, flattened fingers, or a misaligned elbow. Each of these distorts the way your finger contacts the string, producing fuzzy, unclear notes.
This is not about telling yourself to relax. It’s about fixing the specific mechanical issue that causes each mistake. Consider this a direct repair guide: for every error, you’ll get the root cause and the exact correction.
Why Your Violin Tone Sounds Scratchy and Thin
The symptom is a rough, hairy edge on the note that travels with the bow, especially noticeable on long strokes or string crossings. The main cause: your fingertip isn’t landing clean and perpendicular on the string. Instead, it hits at an off-angle, applies uneven pressure, or lets the pad drag—and the bow amplifies the friction.
When a wrist collapses, the string buzzes against the fingerboard. When a thumb squeezes, the entire hand tenses and loses fine control. When the elbow stays locked in one place, your fingers have to reach sideways, which sacrifices accuracy and adds unintended tension.
The 3-Step Quick Fix for an Immediate Improvement
These adjustments address the most common source of scratchiness—misalignment and excess tension—and often produce a clear difference in a few minutes.
- Straighten your wrist into a neutral line. Check a mirror. The back of your hand and forearm should form one unbroken line, not a backward bend toward the scroll. Correct it if you see a break.
- Lighten your thumb grip. Place your thumb so it barely touches the neck—just enough for stability, never enough to whiten a knuckle. Play a scale while keeping that light contact; the fuzz will reduce.
- Lift each finger cleanly between notes. Don’t slide off; lift straight up with a quick motion. This stops the finger from brushing adjacent strings or causing a half-contact buzz.
Step-by-Step Troubleshooting: What’s Really Causing the Scratch
Collapsed Wrist – The Foundation of Scratchy Sound
What causes it. The wrist drops back when the hand reaches for notes while the forearm stays still. The root cause is a habit of tensing up during shifts or fourth-finger stretches, which puts strain that the wrist absorbs by bending. The arm needs to move with the hand.
How to confirm it’s the issue. Play a G major scale in front of a mirror. If your wrist bends back every time you place your third or fourth finger, the collapse is habitual. You’ll also see your fingertips approaching at an angle instead of dropping straight down.
Exact steps to fix it.
- Align forearm and hand as one unit. Visualize a ruler from your elbow to your knuckles. Keep that ruler flat while tapping each finger on a table, then transfer the feeling to the violin neck.
- Practice “ghost fingers.” Set your hand in third position to reduce stretch, then tap your fingers without pressing fully down. Keep the wrist motionless; if it moves, reset.
- Use a tactile reminder. If the collapse persists, place a small rolled-up sock or soft ball against the inside of your wrist so you feel it when you bend. Play a short passage and let the reminder guide you back to alignment.
Thumb Claw – Squeezing That Kills Clarity
What causes it. When the fingers press, the brain reflexively tightens the thumb as a counterforce. The real problem: finger pressure comes from small hand muscles, not from the arm’s weight. That creates a clamp.
How to confirm it’s the issue. Play an open A string, then press your first finger on the same string. If your thumb stiffens the moment your finger touches, you’re clawing. Check for a sharply bent thumb joint or a white knuckle.
Exact steps to fix it.
- Let the arm do the work. Think of your arm’s weight dropping through your finger. Practice by holding the violin and simply resting your finger on the string, letting gravity supply most of the pressure.
- Play without the thumb. Lift your thumb off the neck completely and play a few notes on the A string using only your fingers and the support of your chin and shoulder. Return the thumb with the lightest possible contact.
- Rehearse shifting while the thumb skims. Glide your hand along the neck with the thumb hovering just above the wood. This trains the thumb to be a guide, not a grip.
Flattened Fingers – When the Pads Touch the String
What causes it. A fear of missing the note or losing pitch makes a player push harder, collapsing the finger joints. The fingertip becomes a wide, soft pad that muffles vibration and adds scratchiness. The actual problem: misunderstanding how little pressure a clean note needs.
How to confirm it’s the issue. Watch your fingertips while playing a slow D major scale. If the fleshy pad below the nail is the contact point instead of the tip, the finger is flat. The note will sound duller and you might brush a neighboring string.
Exact steps to fix it.
- Arch your fingers like a tunnel. Each finger should form a curved bridge. Wrap your fingers around a pencil and hold that shape; that’s the model for the fingerboard.
- Use fingertip-only contact. Place just the very tip of your finger with the smallest motion possible. If the sound is fuzzy, reduce pressure until the vibration clears—often you’ll need less than expected.
- Check intonation with light touch. Use a tuner or drone, aim for a resonant pitch, and keep pressure minimal. This proves a well-placed finger doesn’t require force.
Misaligned Elbow – The Silent Saboteur
What causes it. A stationary elbow—tucked to the ribs regardless of string—forces your fingers to squash and stretch sideways. On the G string, a tucked elbow makes the wrist collapse and the fingers land almost horizontally, generating a muffled, scratchy tone. The elbow must move as you change strings.
How to confirm it’s the issue. Play a long note on the G string, then without moving your elbow, try to reach the E string. Your wrist will bend awkwardly and your fingers will twist. That compensation creates scratchiness.
Exact steps to fix it.
- Swing your elbow for each string. Use a mirror. Move your elbow forward toward your left side when you play the G, and relax it back for the E. The motion is only a few inches.
- Practice open-string swings. Bow an open G, then silently swing your elbow to the correct position for the E string while lifting all fingers. Bow the E. Repeat until automatic.
- Feel the balance. When the elbow is correct, your fingers drop onto the string from above, not from the side. There’s a sense of relaxed weight, not strain.
When Scratchiness Persists Despite Good Hand Position
If your alignment and relaxation are solid but the scratch remains, check these less common sources.
- Finger release causing buzz. Lifting a finger can create a sympathetic buzz if it brushes an adjacent string or doesn’t clear cleanly. Practice lifting each finger straight up with a precise, speedy motion—no sliding off.
- Excess tension during shifting. Even with good shape, a shifting thumb that still squeezes introduces a momentary buzz. Practice shift scales (one-finger slides) with a light thumb and relaxed hand.
- Setup and string issues. Old, grooved, or cheap strings sound scratchy regardless of technique. Replace frayed strings. A nut cut too high forces harder pressing, which invites flattening and tension.
- Bow interaction. Over-pressing with the bow or using excess rosin makes the whole stroke scratchy. If your open strings are clear but the scratchiness appears only when fingers touch, the left hand is still the likely culprit.
Building a Left Hand That Stays Clean
Prevent these four errors from returning with daily, targeted habits that rewire the root causes.
- Daily wrist-alignment taps. Spend two minutes tapping each finger on the fingerboard while keeping your wrist straight. No sound needed—just the motion.
- Thumb-free scale variations. Play a one-octave scale with your thumb hovering off the neck. Do this twice per session.
- Mirror checks. Glance at your elbow and wrist position every few minutes during practice. Immediate feedback beats reviewing a recording later.
- Record short phrases. Record four bars, listen for scratchiness, correct the left-hand positioning you suspect, and rerecord. This locks the connection between sound and physical fix.
Frequently Asked Questions About Left-Hand Scratchiness
Is my scratchy sound definitely a left-hand problem, not the bow?
Test it: bow a long open string with a consistent light stroke. If the tone is still scratchy, bow pressure or rosin may be the issue. If the open string is clear and scratchiness appears only when you place fingers, it’s a left-hand problem.
How do I stop squeezing the neck when playing fast passages?
Squeezing often comes from anticipating difficulty. Practice fast passages at a whisper-quiet dynamic with a bow stroke that barely touches the string. The reduced volume forces the left hand to relax because hard pressing would overpower the sound. Keep the thumb light, then gradually increase volume.
Why does my violin sound scratchy only on the G string?
The G string demands the most elbow movement. A tucked elbow forces fingers to approach sideways, flattening the tip and causing buzz. Swing your elbow forward when playing the G so your fingers can drop straight down.
Should I use stickers or tapes to fix finger placement?
Tapes help with intonation reference but they don’t fix the mechanics behind scratchiness. A finger can land on the right spot yet still be flat or tense. Use tapes for pitch, but correct the hand shape separately.
Does hand size affect scratchy tone?
Smaller hands may prompt more collapsing or stretching, especially on lower strings. The correction remains the same: keep the wrist aligned, move the elbow, and arch the fingers. Proper mechanics allow even small hands to produce a clean tone—compensation comes from arm position, not finger contortion.
Still Scratchy? The Next Step
If you’ve corrected every error and the scratchiness remains, get another set of eyes. Have a teacher observe your left hand from the side as you play—a subtle collapse or claw can be invisible from your own viewpoint. Record a side-view video and replay it slowly. If the mechanics look correct, take your instrument to a luthier. A high action or poorly cut nut can produce the same sound even with perfect technique.